From the Navigation
Menu, click on ‘Software Settings’, then locate and click on the
Access Schedules icon.
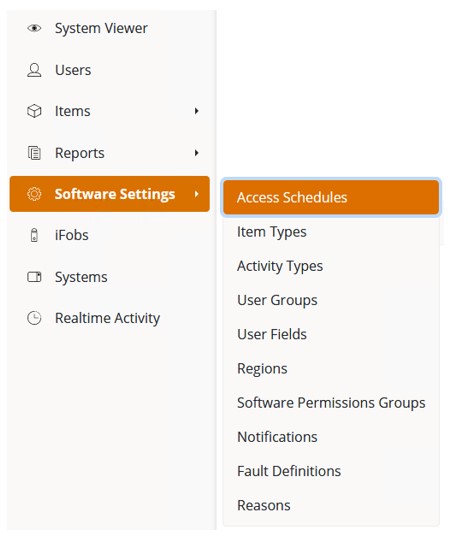
At the next page, click on the Create button. You will now be taken to the New Access Schedule page.
Add a name for the Access Schedule and then check the required
boxes for the schedule interval and create the start and end time.
An example is shown below:
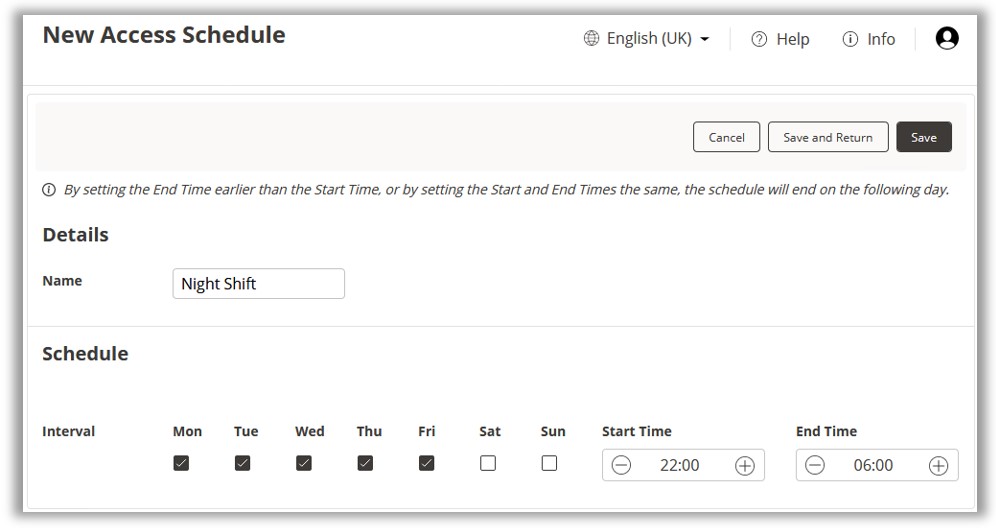
NOTE:
In the example above, the start time is set for 22:00 and the end
time is 06:00. The Access Schedule for Friday will end on Saturday
morning even without the check box for Saturday being ticked.
Once complete, click on Save.